UV DTF artwork requirements: vector files that stick Hard-surface UV DTF sticks when the file has hard edges — and white where you need it.
UV DTF artwork for hard surfaces works best as clean vector at the exact finished size: hard edges, outlined fonts, stroke weights the transfer can hold, and a separate spot-white (underbase) layer under colors that must stay opaque. A transparent PNG at 300 dpi and final size is acceptable when edges are already crisp and your RIP builds white correctly — but soft anti-aliasing, tiny type and missing white still show on dark cups and clear goods.

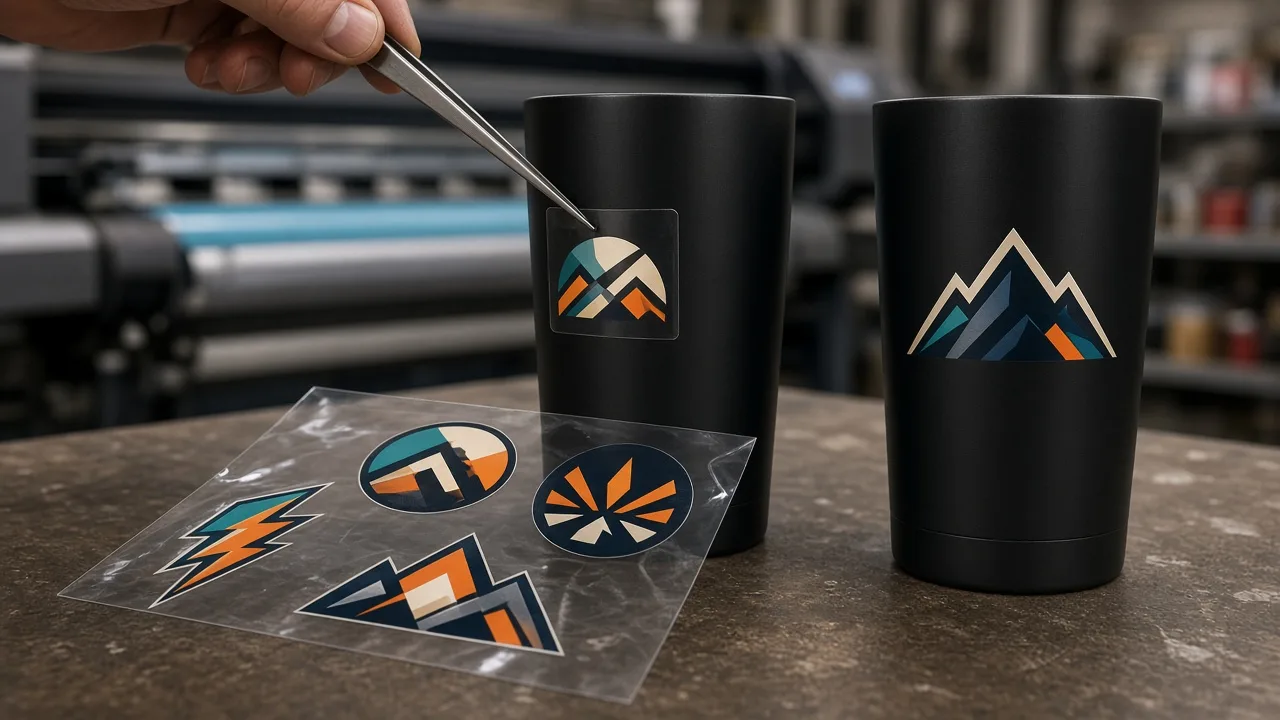
- Build at finished size
Set the artboard to the transfer size on the cup, case or panel. Scaling a soft PNG later invents blur.
- Keep edges hard
No glows, soft shadows or feathered cutouts. Soft pixels pick up unwanted white or look fuzzy after application.
- Add spot white where needed
Put an opaque white shape under solid colors on its own named layer or spot swatch for the RIP.
What UV DTF artwork has to do
UV DTF is a printed transfer film for hard surfaces: drinkware, phone cases, signs and promotional goods. The film carries color, usually white, adhesive and a clear coat. The artwork file decides where ink lands and whether the transfer looks solid after it is rubbed down.
Shops vary on RIP names and sheet layout, but the art rules stay short. VectorWiz prepares the vector master; printing the film and applying it stay with the decorator.
UV DTF artwork checklist
- Exact finished size on the artboard — width and height of the transfer as applied.
- Hard edges and solid fills; avoid soft anti-aliasing, glows and feathered cutouts.
- Fonts outlined so nothing substitutes at the RIP.
- Minimum line weight your supplier publishes (thin hairlines crack or disappear).
- Spot white / underbase as its own layer or named spot under opaque areas.
- Clear areas intentionally empty — no leftover near-white background pixels.
- Delivery as AI, EPS, PDF or SVG with layers named for the shop, plus a PNG proof if they ask.
Hard edges, line weight and soft exports
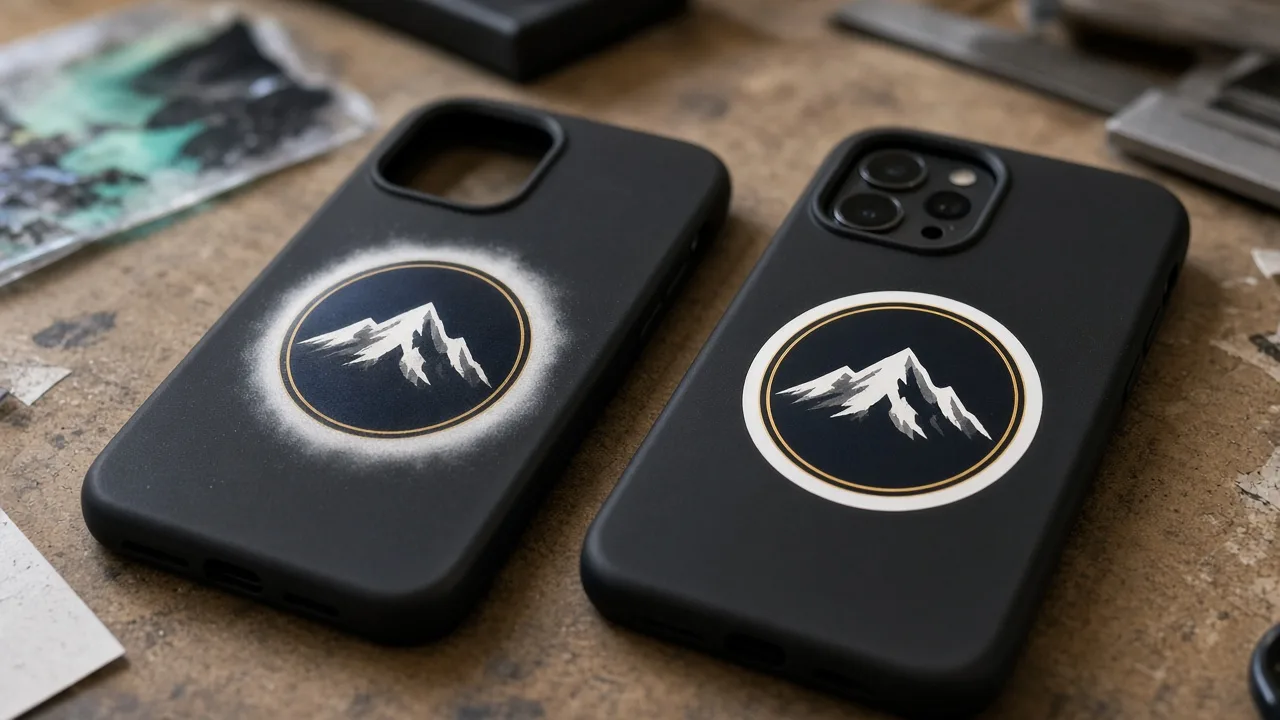
Anti-aliased PNG logos look smooth on a phone and fuzzy on a cup. Partial-transparency edge pixels tell many RIPs to lay white slightly past the color, which reads as a halo — the same failure mode garment printers see, covered in transparency and white underbase.
Ask your film supplier for a minimum stroke. Decorative script and Canva outline effects often fall under it. Rebuild thin detail thicker, or drop it, before you commit a sheet.
Get hard-edge vector with white where you need it.
A designer redraws the logo at finished size, outlines type, and can add a named spot-white layer for your RIP.
Need something custom? Email hello@vectorwiz.com
Spot white and clear windows
On dark tumblers and clear goods, color without white behind it can look dull or see-through. Build a white silhouette slightly choked inside the color, or match the supplier's choke spec. Leave intentional clear windows empty — metallic or translucent accents only work if white is absent there.
Print-and-cut stickers on clear stock use the same idea: a separate white layer named for the RIP. If your UV DTF job is closer to a kiss-cut sticker sheet than a cup wrap, see vector conversion for stickers for cut-contour setup.
When a 300 dpi PNG is enough
Honest split: many UV DTF RIPs print from raster. A transparent PNG at exact size and 300 dpi (or the dpi your supplier states) is fine for bold, already-hard artwork. It is a weak master for the next size, a colorway change or a spot-white edit — those are faster from vector.
| Source | Use it when | Watch for |
|---|---|---|
| 300 dpi PNG at final size | Art is already hard-edged; RIP builds white well | Soft Canva exports, tiny type, leftover fringe |
| Vector + spot white layer | Logos, type, reorders, dark or clear goods | Live fonts, hairline strokes, missing white |
Garment DTF and DTG still center on a transparent PNG export from a clean master — that workflow is on the DTF and DTG service page. Do not mix the two briefs in one order note.
What to send the shop
- Vector file (AI, EPS, PDF or SVG) with outlined fonts and a named white layer if required.
- Finished size written in the filename or order notes.
- Which parts stay clear vs opaque.
- Supplier RIP spot names if they differ from a generic "White" swatch.
- A flattened PNG proof only as a visual — not as the only production file when white must be controlled.
If the only source is a soft web PNG or a Canva export full of effects, redraw first. Fighting the fringe in the RIP costs more sheet waste than fixing the art.
Upload the logo. Get UV-ready vector back.
Hard edges, outlined type, optional spot-white layer — priced at upload from $19, standard handoff in 24 hours.
Need something custom? Email hello@vectorwiz.com
Frequently asked questions
Do UV DTF printers need a vector file?
Vector is preferred for logos and type: hard edges, outlined fonts and a named spot-white layer travel cleanly. Many shops also accept a transparent PNG at exact finished size and 300 dpi when the art is already crisp. Soft, small or photo-heavy files print poorly either way.
What is spot white on a UV DTF file?
Spot white (underbase) is a separate white shape under the colors so the transfer stays opaque on dark or clear hard surfaces. It is a property of the artwork file — usually its own named spot color or layer — not a photo edit. Tell the shop which parts should stay clear.
How is UV DTF different from garment DTF?
Garment DTF is pressed onto fabric and usually prints from a transparent PNG with white built by the RIP. UV DTF is a hard-surface transfer film for tumblers, cases and similar goods, with adhesive and often a separate white layer in the file. File rules overlap on hard edges; the substrate and handoff differ. Garment DTF is covered on the DTF and DTG service page.
When is a 300 dpi PNG acceptable for UV DTF?
When the design is already at finished size, edges are hard, there is no soft halo, and your printer's RIP builds white the way you want. Logos with tiny type, thin lines or soft Canva effects are safer as redrawn vector with an explicit white layer.
Can VectorWiz prepare UV DTF artwork?
Yes. We redraw the logo as clean vector with hard edges and outlined fonts, and can include a separate white layer named for your RIP. We prepare the file; printing and applying the transfer stay with you or your supplier. From $19 by complexity.
Naimur Rahman
Leads design direction and quality at VectorWiz. Reviews and redraws production artwork by hand across sign, wrap, screen-print, and CNC work.
Related articles
Drawn by hand. Built for production.
Hand-redrawn from $19, back in 24 hours. Upload for an instant price, no commitment.