How to convert a PNG to vector. PNG to vector — what auto-trace gets right, and what it misses.
Nothing inside a PNG is a path, so converting one to vector means rebuilding the artwork as geometry — either by a tracing algorithm that guesses at the edges, or by a designer who redraws it. If your PNG is flat-color, large and headed somewhere forgiving, Illustrator's Image Trace or Inkscape's Trace Bitmap will get you a usable file. If it is small, contains type that has to match, or is headed for a cutter, press or embroidery machine, a manual redraw is the shorter path to something that actually works.

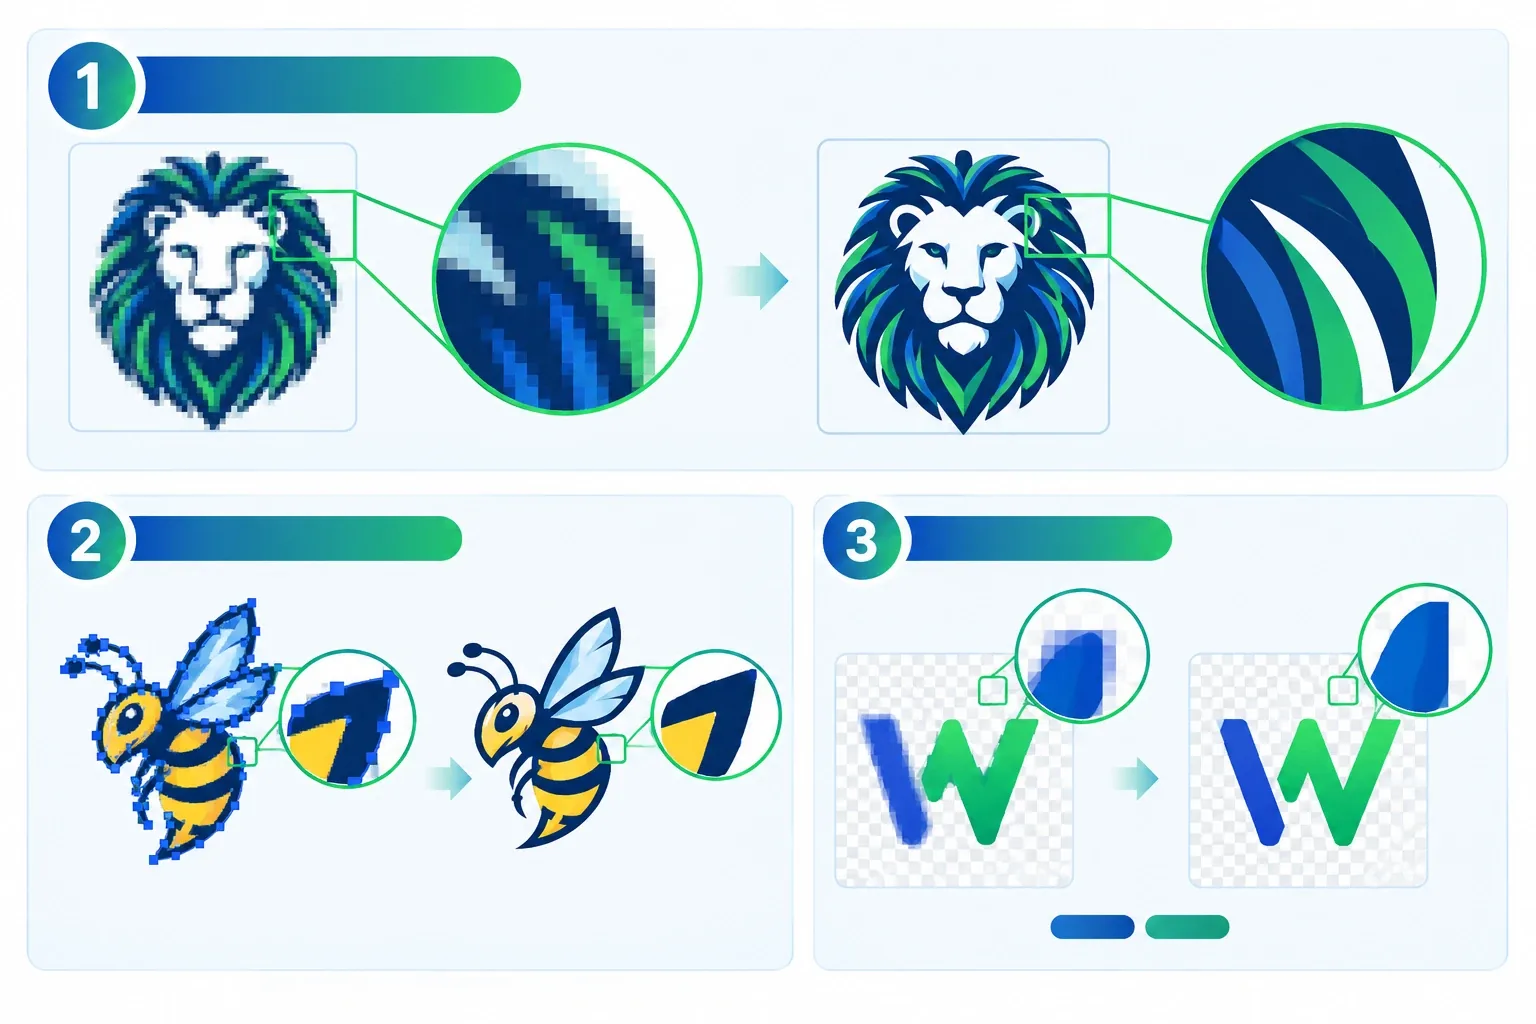
- Check what kind of PNG you have
Zoom to 400% or more. Flat color with hard edges traces well. A soft fringe of intermediate pixels, or blocky compression artifacts, means the tracer has noise to fit to.
- Pick the route the output deserves
Auto-trace for clean marks going somewhere forgiving. A manual rebuild for anything heading to vinyl, embroidery, screen print or CNC.
- Verify before production
Closed paths, outlined type, separated colors, sane anchor counts. Raw traced output usually fails at least one, and the machine is where you find out.
What converting a PNG to vector actually means
A PNG is a grid of pixels. A vector file is a set of mathematical paths. The two formats hold fundamentally different information, so there is no lossless conversion between them.
Drawn by hand. Built for production.
Instant pricing, no commitment. Production-correct vectors in your inbox in 24.
Need something custom? Email hello@vectorwiz.com
The file stores color values for a fixed grid, which is why enlarging a PNG softens the edges — there is no extra detail to reveal, so the renderer interpolates between the pixels it has. Vector formats store geometry instead: anchor points, Bezier curve handles, fills and strokes. Geometry has no fixed resolution, so the same file prints crisply on a business card and on a building wrap.
Because nothing in the PNG is a path, something has to invent the paths. The only real question is whether a machine invents them or a person draws them, and how much that difference matters for your output.
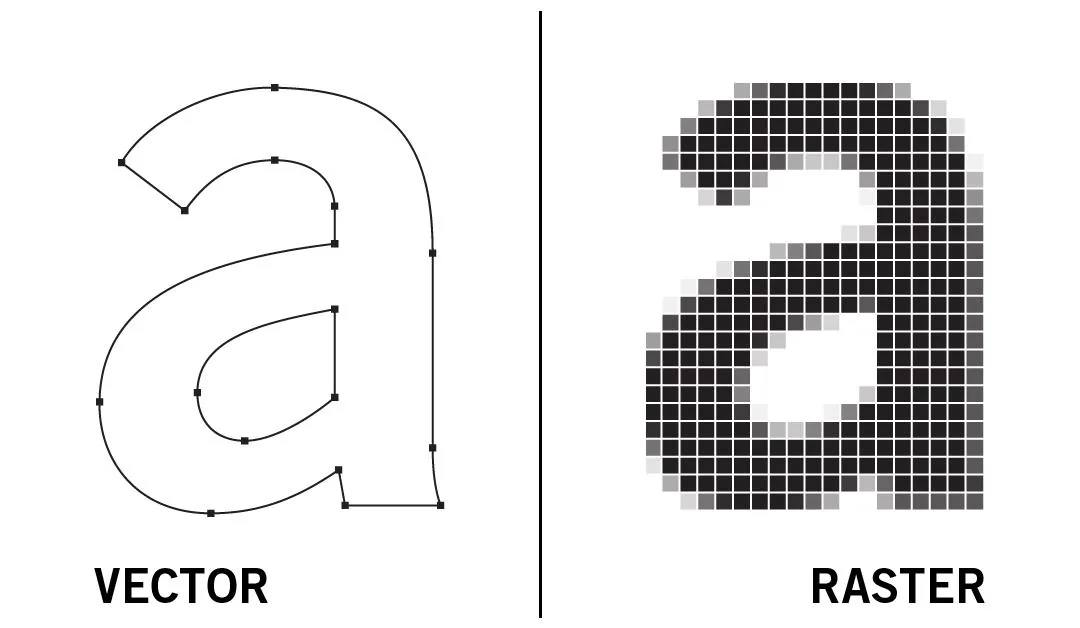
Check what kind of PNG you have first
The conversion path forks here, and skipping this step is the most common reason people end up with unusable output. Open the file and zoom to 400% or more.
Flat-color artwork with hard edges
Solid color regions, crisp boundaries, no gradients or photographic texture. This is the best case. If the PNG is also reasonably large — say 1,000 pixels across or more on the logo itself — auto-tracing can produce a usable starting point, sometimes a usable finished file.
Small, compressed or heavily anti-aliased artwork
Zoom in and you see a fringe of intermediate pixels blending each edge into the background, or blocky artifacts from repeated re-saving. Tracers read that fringe as real geometry and produce wavy, lumpy outlines with far more anchor points than the shape needs. A 200-pixel-wide logo pulled from a website almost always lands here.
Photographic or gradient-heavy images
A tracer will turn a photograph into dozens of stacked color shapes. The result is a stylized illustration, not the original photograph in a new format. That can be exactly what you want for a poster. It is the wrong tool if you needed the photo itself.
The three conversion routes
1. Auto-trace in Illustrator or Inkscape
Illustrator's Image Trace and Inkscape's Trace Bitmap both threshold the image and fit paths to the resulting regions. They are fast, already bundled with software most shops own, and genuinely adequate for clean single-color marks. Their weakness is that they fit to what is in the pixels, including compression noise and anti-aliasing — they have no concept of what the shape was supposed to be.
2. AI vectorizers
Tools trained on large artwork corpora produce noticeably smoother geometry than classic thresholding, particularly on photographic source. They still output a stylistic interpretation. Color separation, font outlining and layer structure are not part of what they deliver, so production work still needs a pass afterwards.
3. Manual reconstruction
A designer redraws the artwork as deliberate geometry — circles drawn as circles, straight edges as straight segments, type set in the real font or redrawn and outlined. Nothing in the output traces back to the pixel fringe, because nothing was traced. This is slower, and it is the only route that reliably produces files that behave in production.
Auto-tracing a simple PNG logo, step by step
If your file is flat-color and large enough, try this before paying anyone. In Illustrator:
- File > Place and bring in the PNG, then select it.
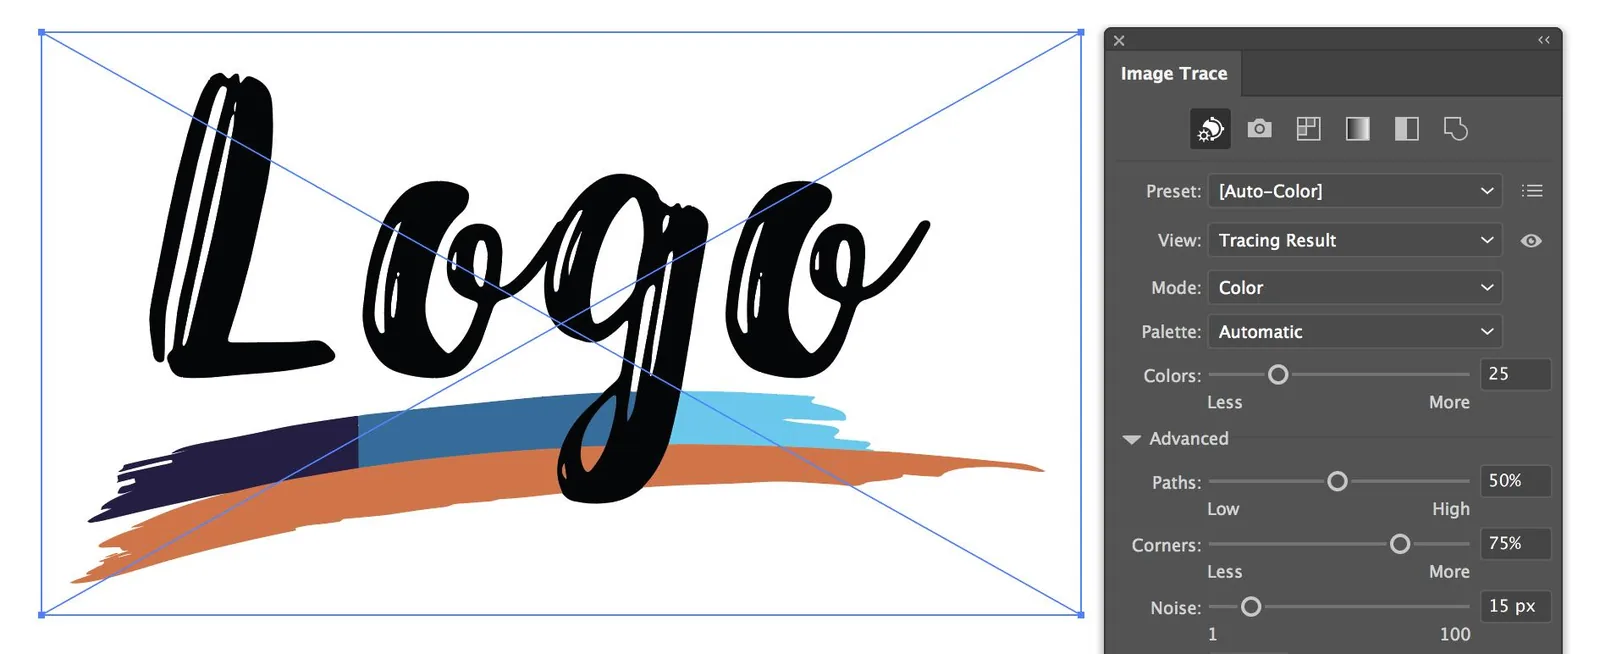
- Open Window > Image Trace and choose a preset — Black and White Logo for a single-color mark, 3 Colors or 6 Colors for a simple flat design.
- Open the Advanced panel and raise Paths slightly, lower Corners, and raise Noise to suppress compression speckle.
- Click Expand to convert the live trace into real paths.
- Switch to the Direct Selection tool and inspect the anchor points. If a straight edge carries a dozen points, the trace fitted to noise.
- Delete the stray points, close any open paths, and save as SVG, EPS or AI.
In Inkscape the equivalent is Path > Trace Bitmap, then Path > Simplify to thin out the node count. Simplify is blunt — it will round off corners you wanted to keep, so apply it in small doses and watch the shape.
Transparency is not the same as a clean edge
PNG supports an alpha channel, which is why it became the default format for logos on websites. A transparent background is convenient, but it is not evidence that the artwork will trace well. The alpha channel is itself anti-aliased: the outermost ring of pixels is partially transparent, which produces exactly the soft fringe that tracers mishandle. A transparent PNG saved at a small size has the same problems as any other small PNG.
What production-ready actually requires
Artwork that looks correct on screen can still fail at the machine. Most rejected files fail on one of these four points:
- Closed paths. Cutters, routers and engravers follow a path from start back to start. An open path — common in traced output — either fails to cut or produces an unexpected toolpath.
- Outlined type. Live text depends on the font being installed wherever the file is opened. Converting type to outlines turns letterforms into geometry that travels with the file.
- Separated colors. Screen printing and vinyl work need each color as its own layer or spot color, not a flattened composite.
- Sane anchor counts. Excess nodes produce visible facets on large output and slow or stutter cutting hardware.
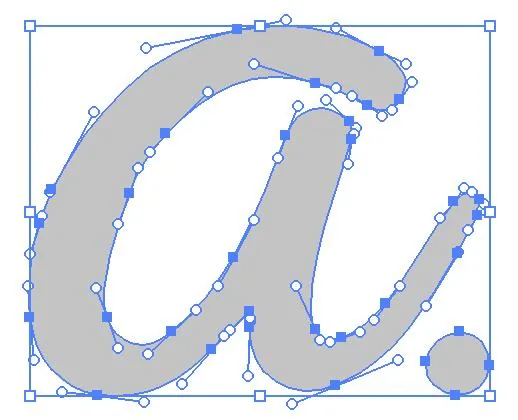
A trace that passes a visual check and fails all four of these is an ordinary outcome, not an unusual one. This is the gap between artwork that looks vector and artwork that is production-ready.
Which format should you deliver?
| Format | Best for | Watch out for |
|---|---|---|
| SVG | Web, app UI, responsive logos | Fonts must be outlined or embedded |
| EPS | Screen print, legacy print workflows | No transparency support in older readers |
| AI | Editable master file, layered artwork | Needs Illustrator to open natively |
| Proofs, client review, print handoff | Can carry raster content and still be called a PDF | |
| DXF | CNC, laser, routing | Closed paths and real-world scale are mandatory |
If you are not sure, ask whoever receives the file what their RIP or cutting software expects. The format argument is usually settled by the hardware at the far end. Our breakdown of vector file formats covers the trade-offs in more depth.
When to stop tracing and hand it to a person
Auto-trace is worth attempting when the source is clean, the output is going somewhere forgiving, and you can afford to inspect and tidy the result. Hand the file to a designer when any of the following is true:
- The only copy you have is small, screenshotted or scanned.
- The artwork contains type that must match the original font.
- The job is going to a cutter, router, press or embroidery machine.
- The mark has to sit alongside existing brand assets and match them exactly.
- You have already spent longer cleaning the trace than a redraw would take.
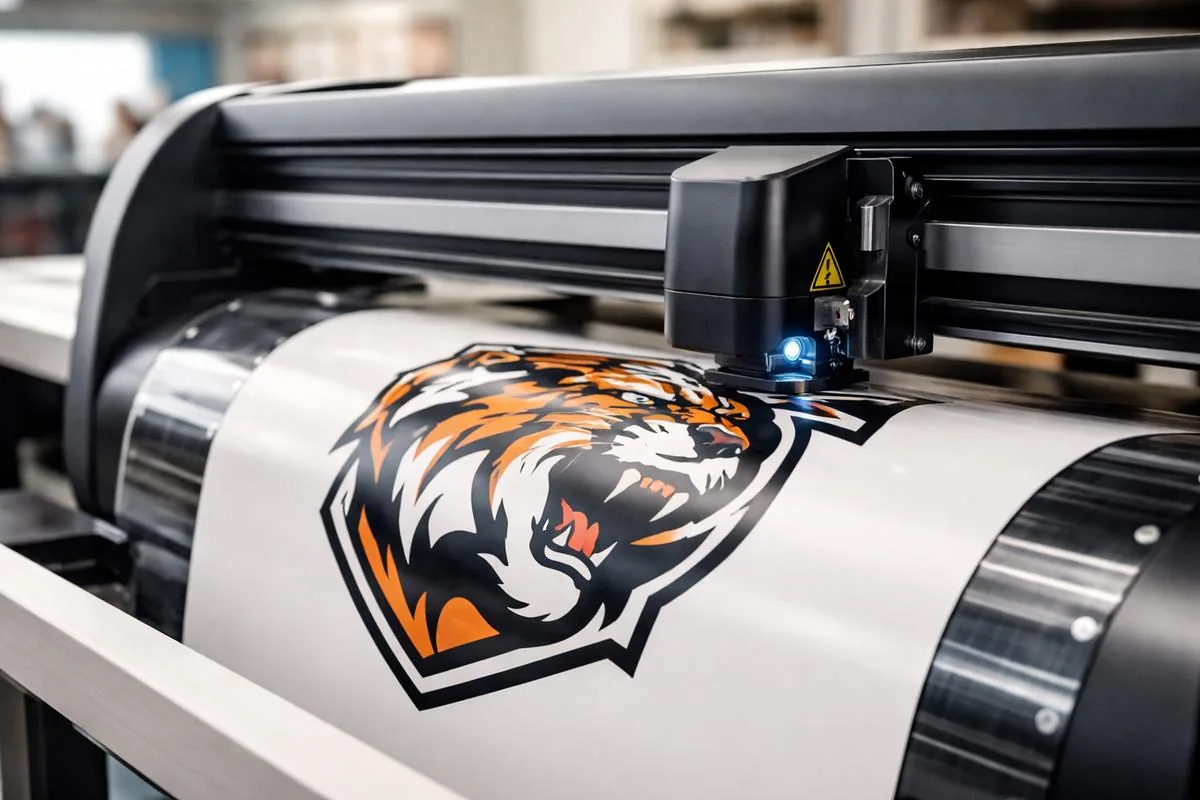
That last one catches more people than the rest combined. Cleanup time on a bad trace is open-ended, and it is easy to sink an afternoon into a file that a redraw would have resolved in a fraction of the time. VectorWiz works as manual vector conversion specialists precisely because the redraw is usually the shorter path once a file has gone wrong — the artwork is rebuilt as deliberate geometry rather than repaired trace-by-trace.
Getting a file you can send to production
Try the trace first if your PNG is clean and the stakes are low — you may not need anyone's help. If the source is rough, the type matters, or the file is heading for a machine, a redraw is the faster route to something that works. VectorWiz rebuilds artwork by hand into closed, production-ready paths in the formats your equipment expects; you can send us the file and get it back as a working vector.
Frequently asked questions
Can I convert a PNG to vector without Illustrator?
Yes. Inkscape is open-source, and its Path > Trace Bitmap tool covers the same ground as Image Trace. Save as Plain SVG when you are done. For production output the limitation is not the software, it is the quality of the source PNG and the cleanup afterwards.
Why does my converted PNG still look blurry?
Almost certainly it was not converted. Placing a PNG inside an SVG, EPS or AI file embeds the pixels in a vector container without changing them. Open the file and click the artwork — if it selects as a single rectangular object with no editable anchor points, it is still raster.
What size PNG do I need for a good trace?
There is no fixed threshold, but the artwork itself — not the canvas — should be large enough that edges read as hard boundaries rather than gradients when you zoom in. Below roughly 500 pixels across, expect the trace to need substantial correction.
Is a transparent PNG easier to vectorize?
Not meaningfully. The alpha channel is anti-aliased like any other edge, so the outer pixels are partially transparent and tracers read that fringe as geometry. Transparency helps you composite the image; it does not improve the trace.
Can a traced PNG be used for vinyl cutting or embroidery?
Only after it has been checked and corrected. Cut and stitch workflows need closed paths, separated colors and controlled node counts, and raw traced output typically fails at least one of those.
Tanvir Chowdhury
Runs production operations at VectorWiz. Writes about file briefs, intake, and the production-side details shops learn the hard way.
Related articles
Drawn by hand. Built for production.
Instant pricing, no commitment. Production-correct vectors in your inbox in 24.